Macarons in Blender
Today I want to show how to make photorealistic macrons. It’s been something I wanted to make for a while. When I initially looked around to see if anyone else made them, the only good ones were either photoscanned models or weren’t realistic enough for me. There were also no real tutorials showing how to make them so I tried various techniques. Since they involved some interesting techniques, I decided to share my findings. Let’s get started.
Most importantly, I wanted to share my thought process. Many times, I see people asking “how did you come up with the techniques?” and I feel learning the thought process is the best way to learn. Copying click-for-click instructions can only get you so far.
I’ve also created a corresponding video. Take a look if you want to see some of the steps in action.
1. Composition
Start by decomposing a real macaron. It is composed of 3 main parts:
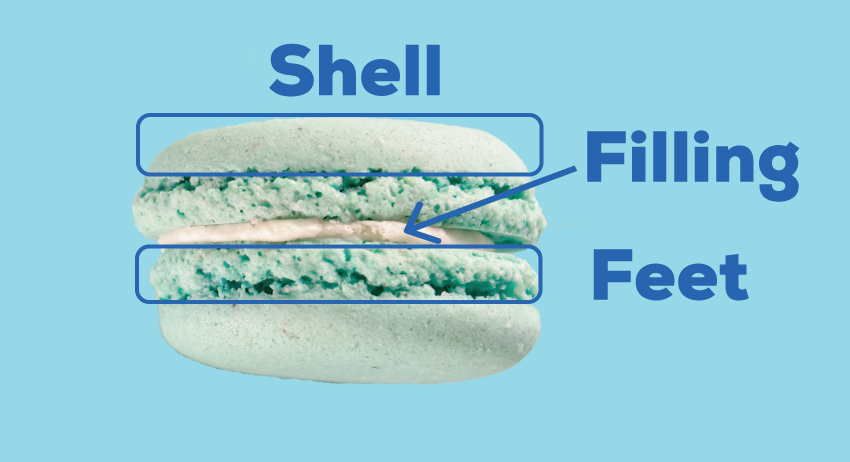
The Cap
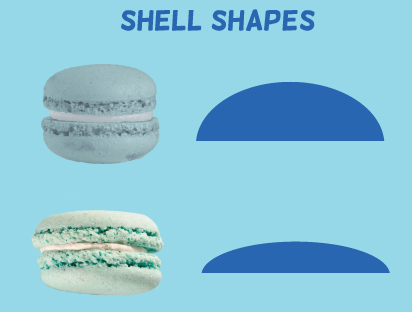
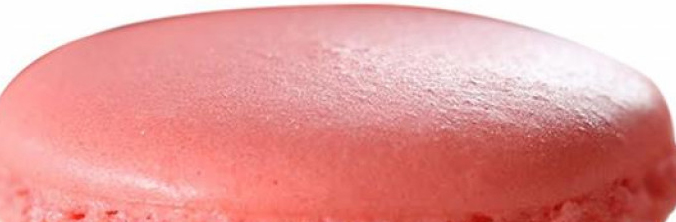
The cap refers to the top portion of the macaron “shell”. They are usually in the shape of a ‘flattened’ half sphere. Some macarons are very flat while others are very round (see fig 1.2.1 for a comparison). This is a artistic choice you’ll need to make.
Note: Sometimes ‘shell’ is used to refer to the entire non-filling part of a macaron as a singular unit. i.e. “A macaron is made of two shells with filling in the middle”, but in our definition, when we say ‘shell’, we only refer to the upper part not including the feet(as per fig 1.1.1).
Feet
Feet(foot) are the bottom portion of the overall macaron shell which expands downward when baking. They have a distinct visual texture from the upper shell. The feet are the most important part of model and is what ‘sells’ the photorealism.
Filling
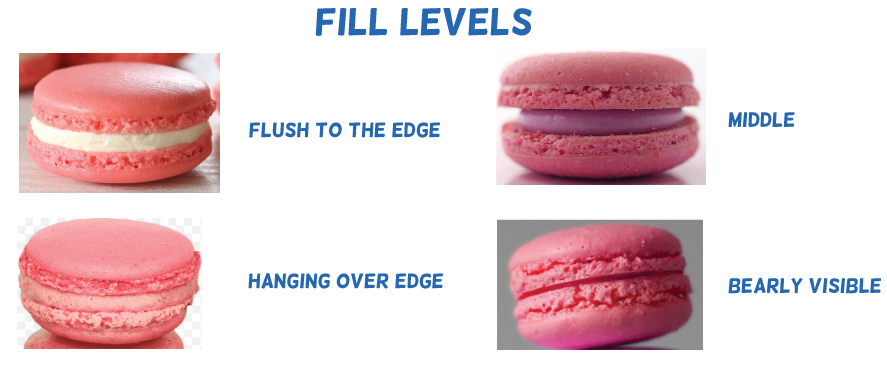
The filling is a cream like substance sandwiched between two shells. Its thickness and how close the filling is to the edge very from person to person so it is another aesthetic decision for you. Some macarons have a thick layer of filling bulging out, while others have so little you can barely see any at all.
The Skin
The skin refers to the color and texture of the shell. Macarons skins are generally smooth but have many small rounded bumps. Depending on the color, there can be a fair amount of reflection. While most macaron skins are smooth and a bit shiny, rough mat color macarons also exist.
2. Before Staring
Scale – It’s important to work with the correct scale. If you model at the wrong scale, you may encounter depth-of-field issues when rendering images. Most macarons have a dimeter of about 1.5 inches or 38 mm.
Apply Rotation and Scale – We’ll be doing a lot of scaling of our mesh to get it the right size. Since we’re using many texture based displacement modifiers, it’s important we apply rotation and scale each time we adjust a mesh’s size. If something isn’t looking correct, often times it’s because you haven’t applied rotation and scale yet.
3. The Shell
Basic Shape
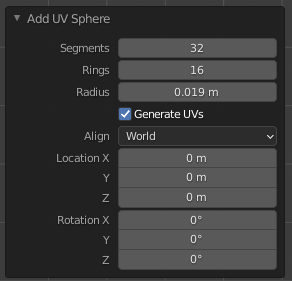
The shell starts as a sphere that has a radius of 19mm with the bottom half removed and filled in with a face (figure 3.1.2). Keep the segments at 32 with 16 rings.
Afterwards, add a subdivision modifier and create a edge loop to make the bottom of the shell more defined (figure 3.1.3).
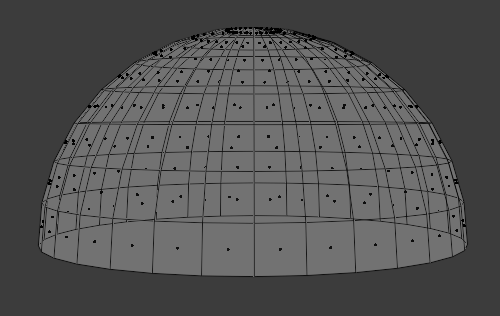
Fig 3.1.2 Top half of sphere 
Fig 3.1.3 subdivided
Add 4 or 5 edge loops on the bottom of the mesh and mark the seams (as per the video).
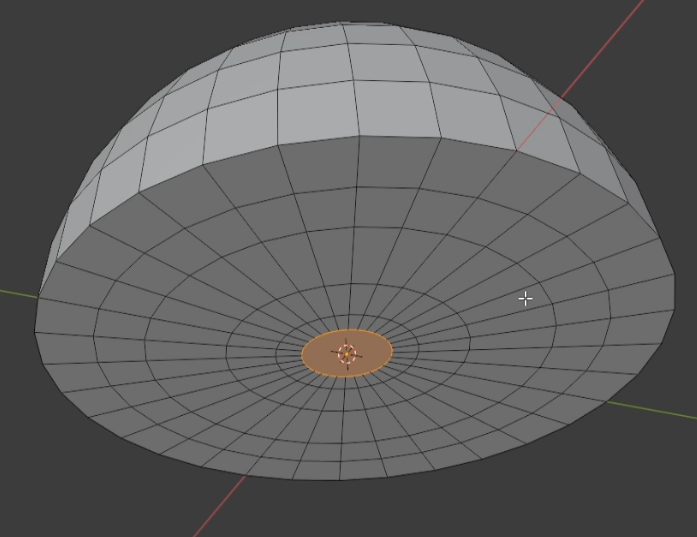
Fig 3.1.4 Edge loops 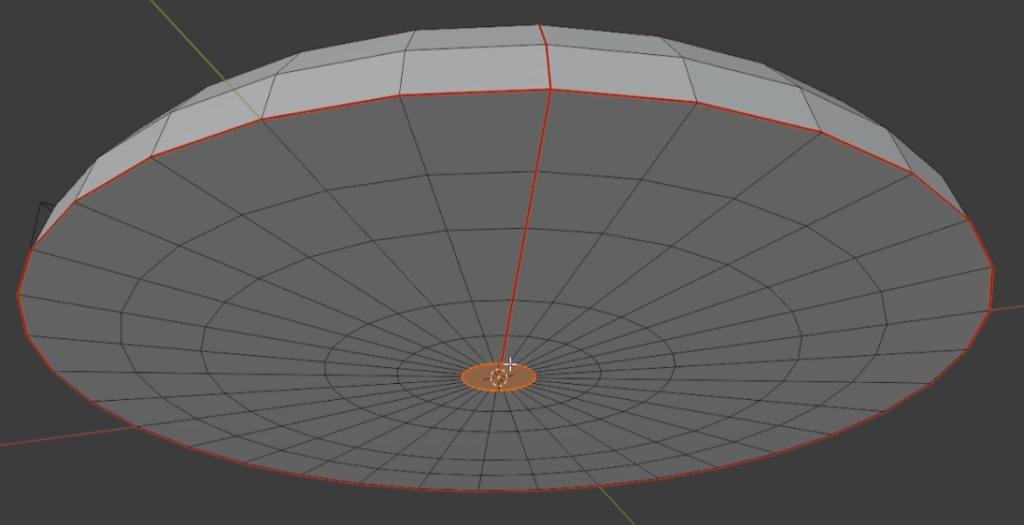
Fig 3.1.5 Adding Seams
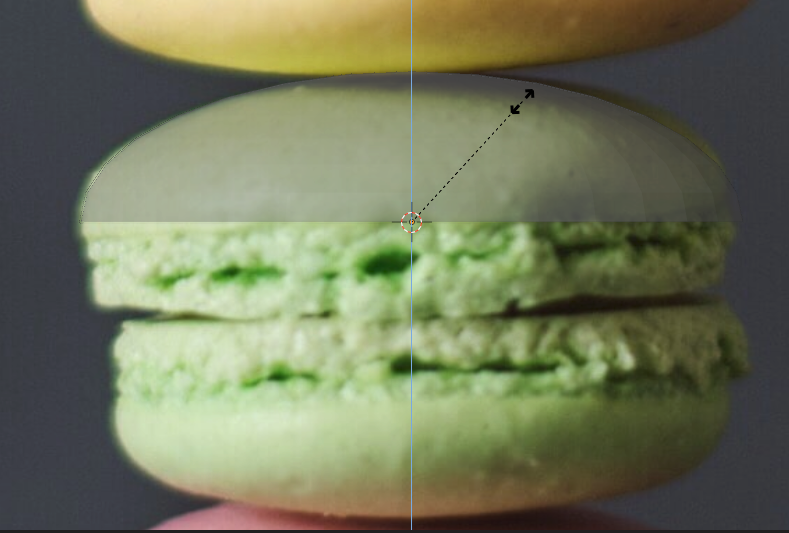
Bring in a reference photograph and adjust the mesh to rough match the shape of your reference. As in figure 3.1.6, you will most likely need to “flatten” the shell along the z-axis and widen it by scaling some loops outward.
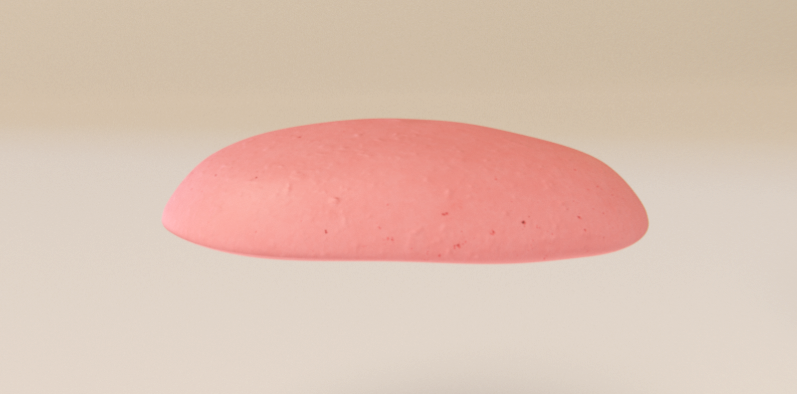
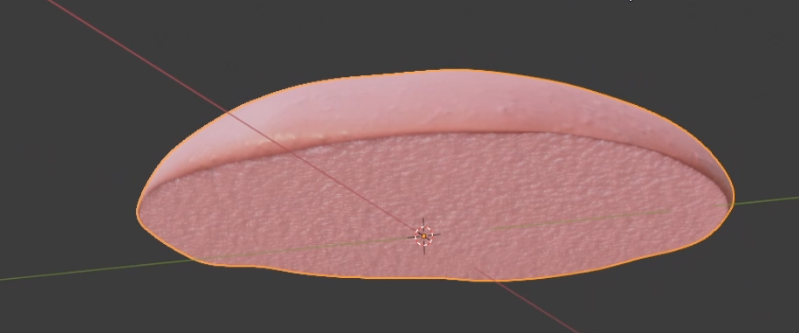
Real macaron shells are not perfect domes. The surface has a gentle unevenness with small indents and peaks. We can achieve this using a subdivision and a displace(cloud texture) modifier. The subdivision level is 3 and for the displace modifier, keep the strength at 0.002 and size of the cloud texture also at 0.002. We’re using small values because macarons are small and we want the displacement to be subtle.
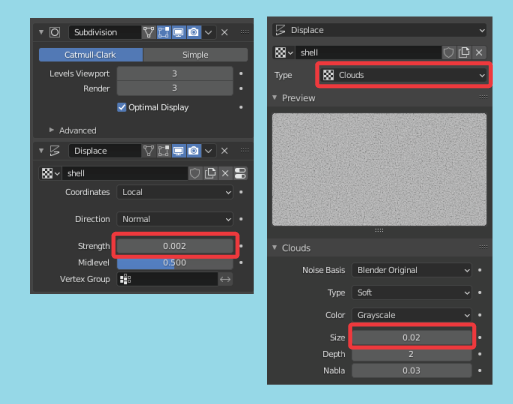
Figure 3.1.8(below) shows the comparison between the original ‘perfect’ shell and one with slight displacement. Keep in mind:
- It is best not to go overboard, only a slight displacement is required.
- You can use grab tool to manually sculpt imperfections as required.
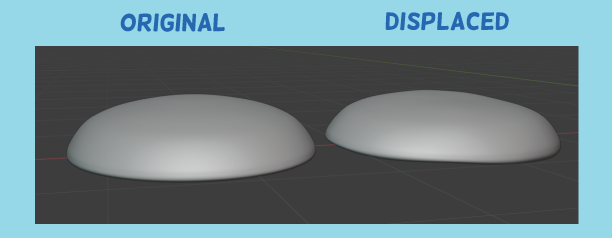
Fig 3.1.8 Displacement modifier
4. The Skin
I made the skin material with Substance Designer. As mentioned previously, the texture isn’t a solid uniform color. Gel food coloring is used for most macarons and when mixed with almond flour and sugar, it results in some inconstant color distribution. You will also see a small number of tiny dark specs throughout.
In addition to the specs, there are often tiny airholes produced when the macarons are baked. These holes are way too small to be produced by mesh displacement but can be accomplished by small black dots in the base color with a depression from the normal map.
All macarons have bumps but the amount and size very greatly. A perfectly flat skin immediately looks fake so we must include some bumps. I’ve provided the material textures in the resources section at the end.
Here is the rendered result:
Now apply the shell material to the shell mesh. We only want to apply the shell material to the upper portion of the shell. First, apply the shell material to the entire mesh. Then select the faces on the bottom of the shell and click “assign” the feet material.
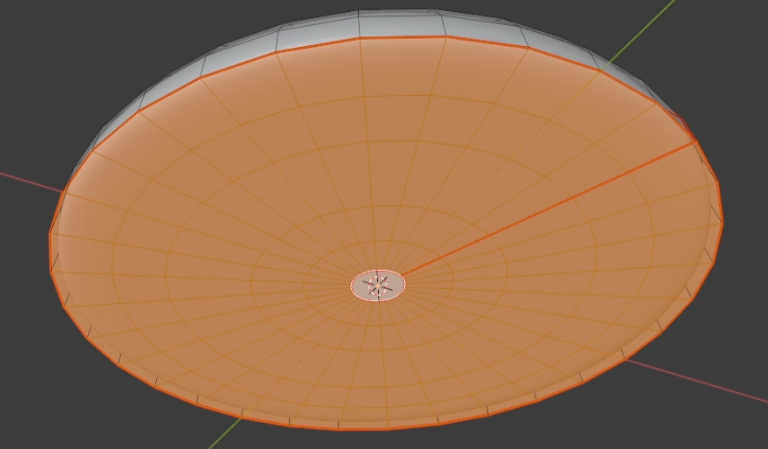
Fig 4.1.3 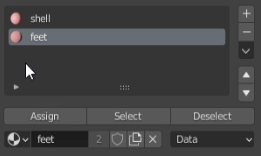
Fig 4.1.4 Shell material assignment
In material view mode, your material assignments on the shell mesh should look like figure 4.1.5. The top half has the smooth shell material and bottom faces have the ‘feet’ material assigned.
5. Filling
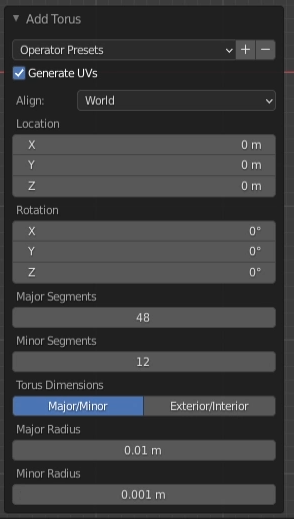
The filling is basically a cylinder or tours whos major radius is 10mm and minor radius is 1mm.
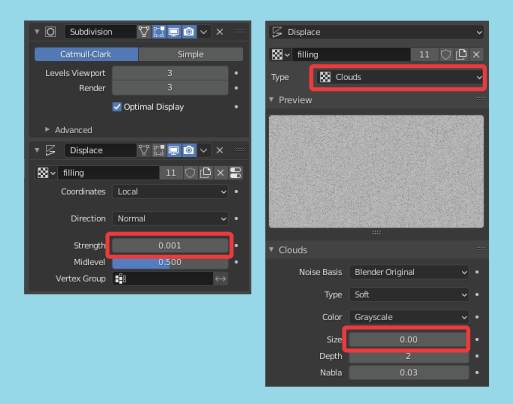
Add a subdivision modifier (at level 3) to create some more geometry and use a displace modifier to create the flowing creamy look (strength at 0.001 using the cloud texture at a size of 0.003).
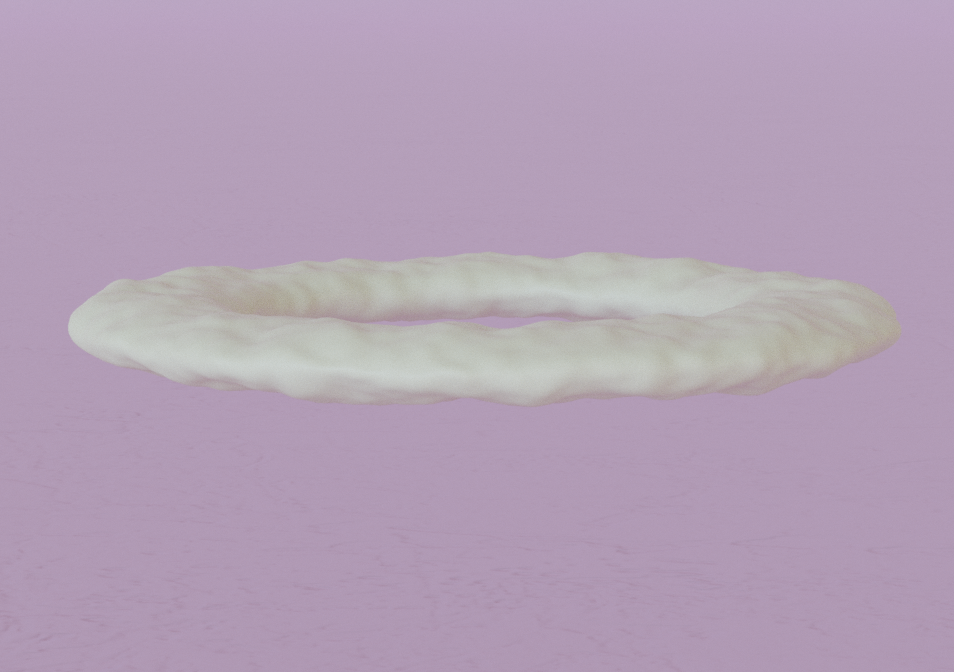
Since the focus of this tutorial is the shell’s mesh, I’ve opted to use a simple material for the filling. Just a note, while this shader setup works with plain “white cream” filling, it won’t work if you are trying to model jelly fillings (that’s a tutorial for another time). I’ve provided an the node setup for the cream filling in the resources section. Assign the material the filling material and render.
That’s it. After rendering, you should see something like figure 5.1.3.
6. Feet
The most difficult part of making a macaron model is the feet. This by far took me the longest time to figure out and what makes or breaks the photorealism. Aside from photoscanned based models, none of the models I saw looked ‘real’ and the primary reason where the feet.
In the following steps, I will show you the general procedure of creating realistic feet. As macarons come in all shapes and sizes, you will have to make slight tweaks as need to reproduce the kind of macaron you desire.
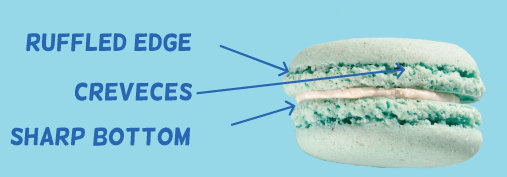
Feet are composed of three main parts (see figure 1.3.1) and we’re going to achieve this by using a cylinder base mesh that is displaced using a cloud texture to achieve the crunchy look. The holes and crevices are created by using a second set of rock-shaped meshes and the boolean modifier to push holes though the afromentioned crunchy cylinder.
Basic Shape
Let’s start with creating a cylinder. The diameter must be around 38mm(radius of 19mm), have 64 vertices and a depth of 4mm (figure 6.1.1). Create 4 or 5 insets on both the top and bottom faces (figure 6.1.2). Finally, re-size the height and diameter so it is about 1/4 of the height of the shell. Don’t forget to apply rotation and scale.
Since we are going to add a subdivision modifier, add two edge loops around the cylinder’s equator. One for the top and bottom. This will make the cylinder keep it’s shape (figure 6.1.3) after we apply the modifier.
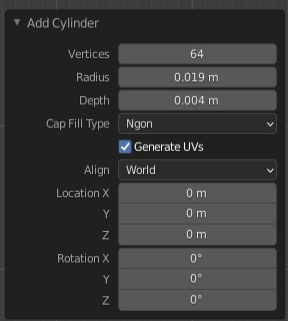
Fig 6.1.1 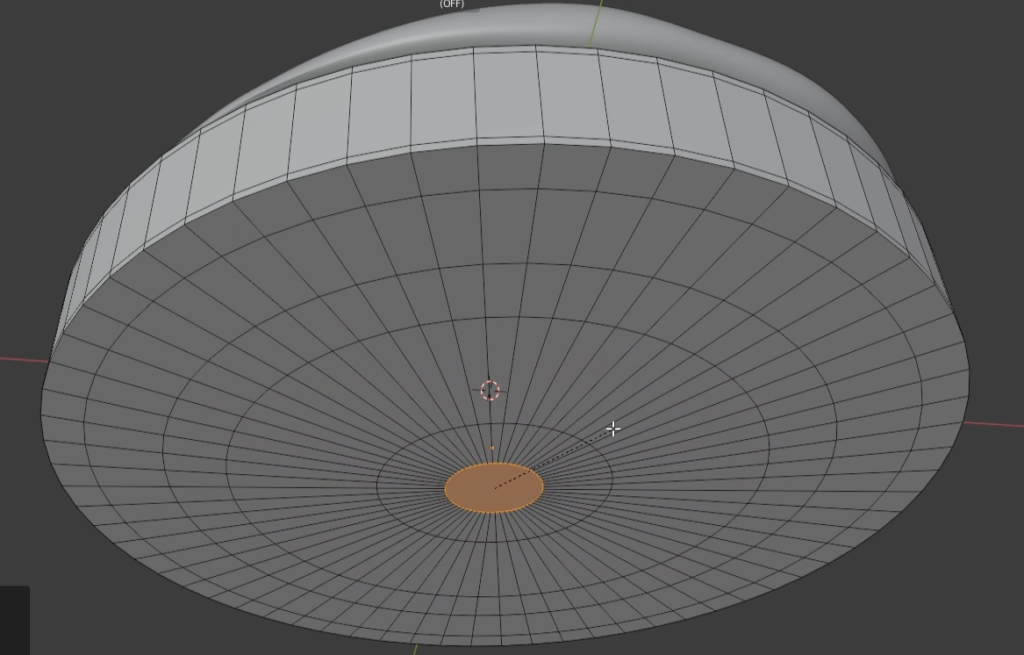
Fig 6.1.2 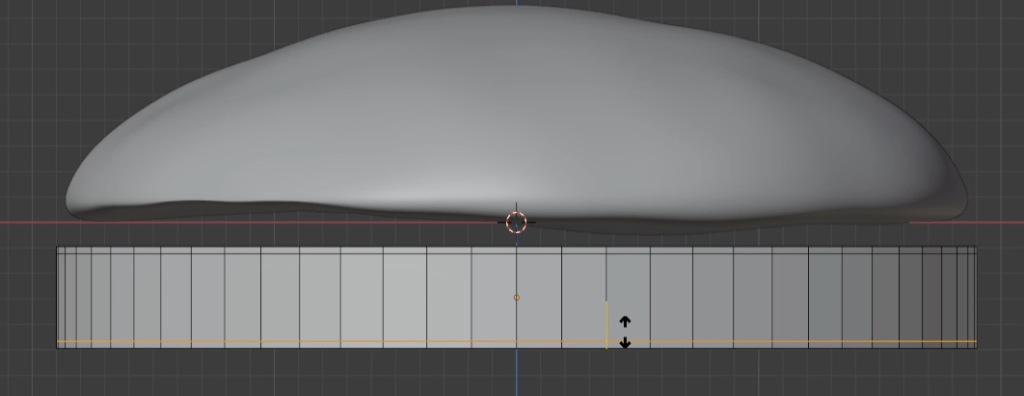
Fig 6.1.3
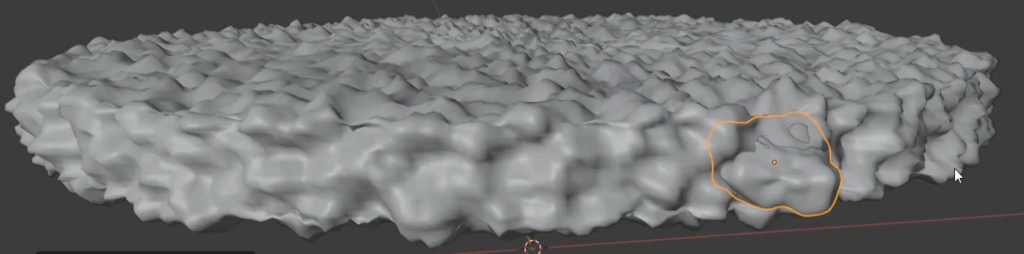
Add a subdivision modifier with level 3. We will be creating the crunchy pattern using a displace modifier. It will look pretty crazy at first. Create a new texture and name it feet. Set the strength to 0.002. Now in the texture tab, select the feet texture, and set the type to clouds. Set the size to around 0.001. You should see the pattern as in figure 6.1.6
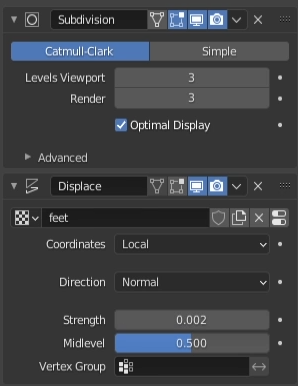
Fig 6.1.4 
Fig 6.1.5

Apply the subdivision and displacement modifiers in order.
The Feet Material
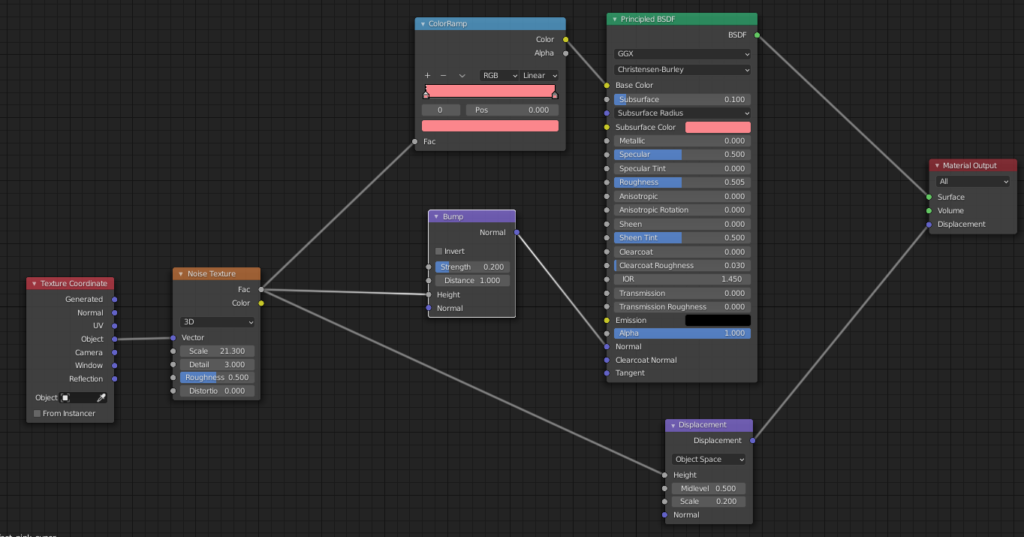
The material for the feet is relatively straight forward. It is basically is basically a near uniform base color for texture with a noise texture for added bump and displacement.
Don’t forget, in the materials tab, under settings -> surface, make sure the displacement option is set to “displacement and bump“. I’ve provided the material node setup in the resources section at the end.
7. Creating Holes and Crevices
And that’s our base mesh for a macaroon’s feet. Now, we need to create the crunchy holes and crevices. We’re going to do this by creating a bumpy sphere and using the boolean modifier to carve out holes from our base mesh using this sphere.
Create the bumpy spheres
First, start with a sphere with a radius of 4 mm. Keep the segments and rings at 32 and 16 respectively.

Fig 7.1.1 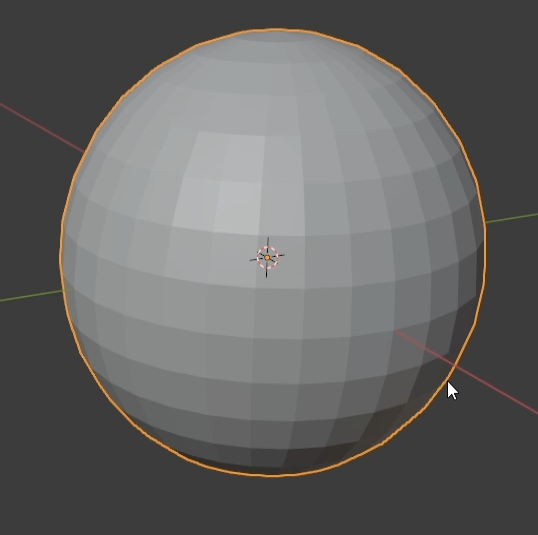
Fig 7.1.2
Create a subdivision modifier and set the levels to 3.
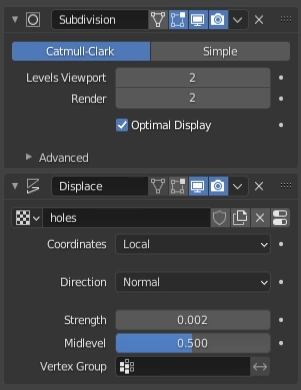
Fig 7.1.3 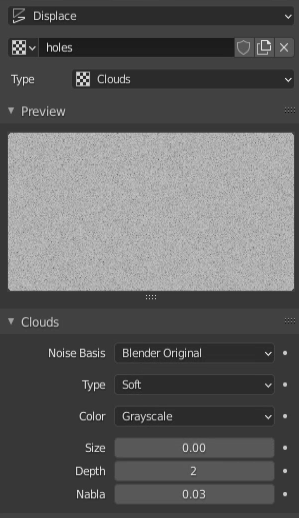
Fig 7.1.4
Like before, we’re going to use a displace modifier using a texture. The strength should be 0.002 with a cloud texture of size 0.002 or 0.003. You can very size and strength to create the kind of bump pattern you need. You can also change the shape of the sphere as well. You should have a crunchy rock like object as in figure 7.1.5.
Create a few variations of these bumpy sphere’s by chaining the scale and texture size. Remember to apply rotation and scale each time. You should see spheres like figure 7.1.6. When you have the desired sphere, apply all the modifiers.
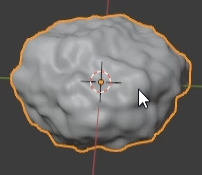
Fig 7.1.5 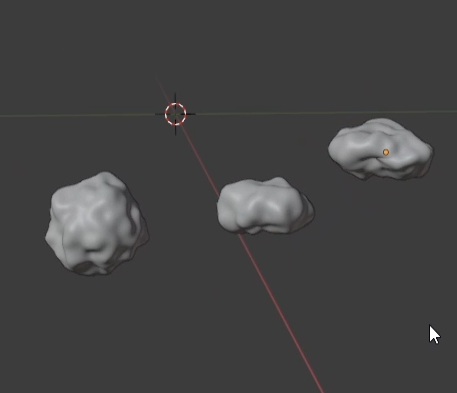
Fig 7.1.6
Create The Holes
Now, we are going to punch some holes out of the crunchy cylinder mesh using the the rocks created above as a model. Move your sphere over to the feet mesh and make it embed about 50% into it.
Select the feet mesh and create a boolean modifier. The target object should be your rock. The overlap threshold needs to be very small. I use a value of 0.00000001 (seven 0s before the 1). Once everything is in position, click apply. If done successfully, once you move the sphere away, you should be left with a nice crunchy hole carved out of the macaroon feet mesh. See figure 7.2.2.
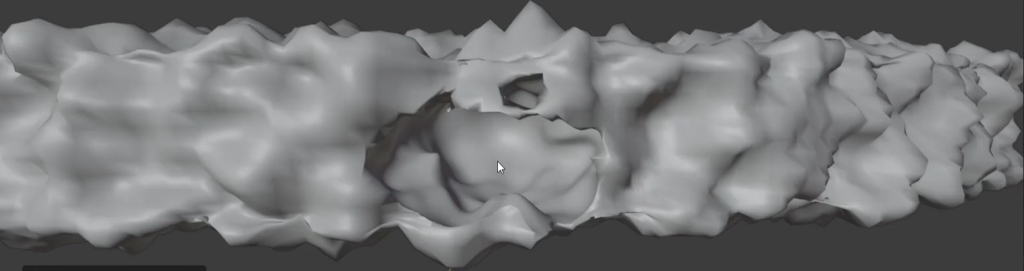
Fig 7.2.2
Do this a few times to create more holes. After a while, you should see something like figure 9.13. Assign the feet model the feet material and you should a similar result to figure 7.2.3 and 7.2.4.
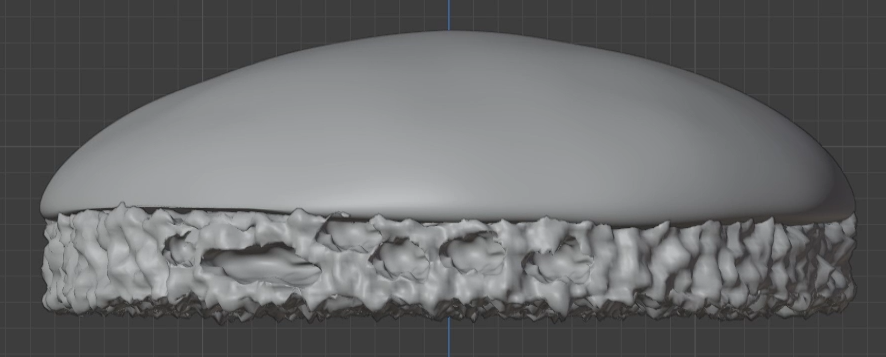
Fig 7.2.3 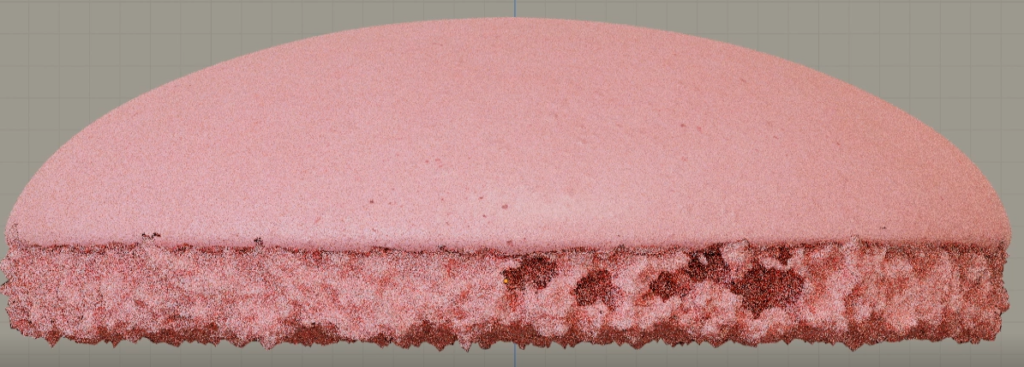
Fig 7.2.4
This process does take some practice. Keep punching holes to create all the holes and crevices that you see on your reference image. After a while, you’ll get something more realistic like figure 7.2.5.
8. Putting it all Together
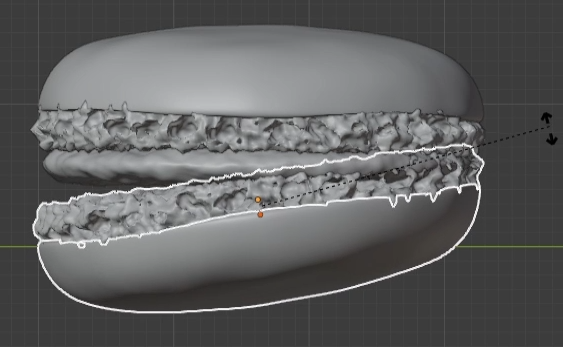
The cap and mesh make up one side of a macaron shell. Since macarons have two shells sandwiching the filling, simply duplicate the cap and feet meshes, flip them, and rotate it along the z-axis and combine the three parts together.

Fig 8.1.1 
Fig 8.1.2
Make sure to rotate the bottom two meshes along the z-axis so that the same holes and crevices on the top shell are not mirrored directly beneath them on the bottom shell. In addition, make sure the shells are not totally level with the horizon. Human hands press macarons together, so we need some imperfection here. See figure 8.1.3 for an exaggerated example. Do this for both the top and bottom shells.
Conclusion
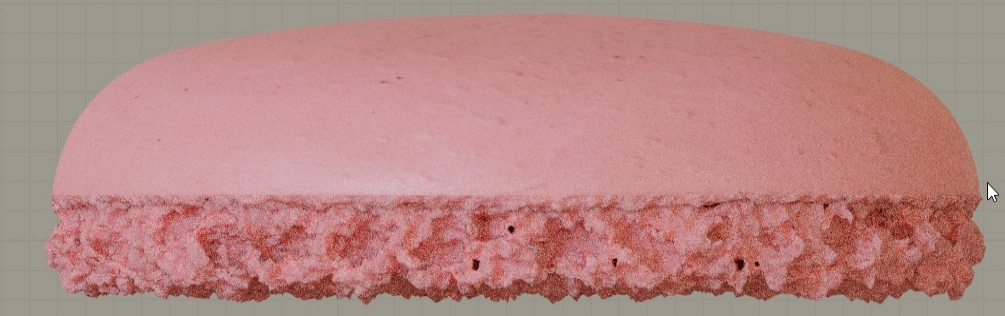
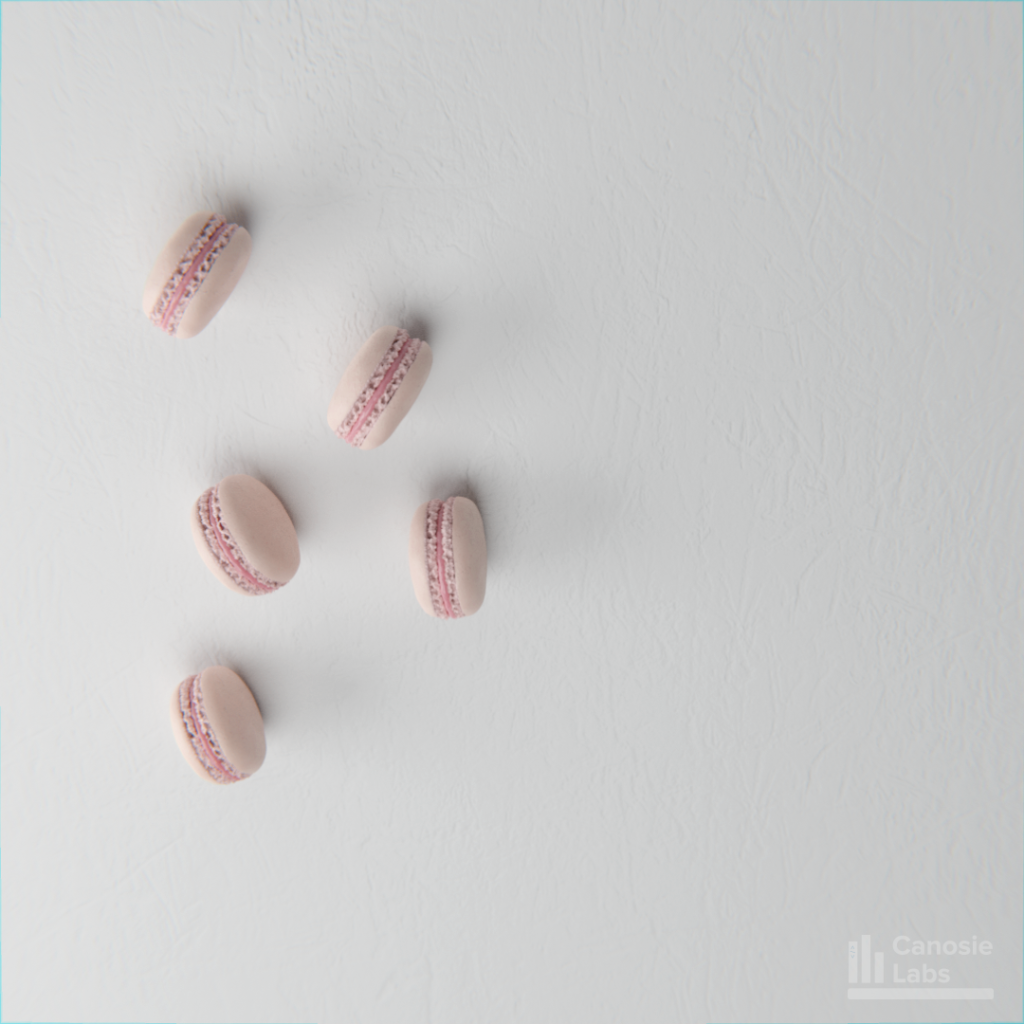
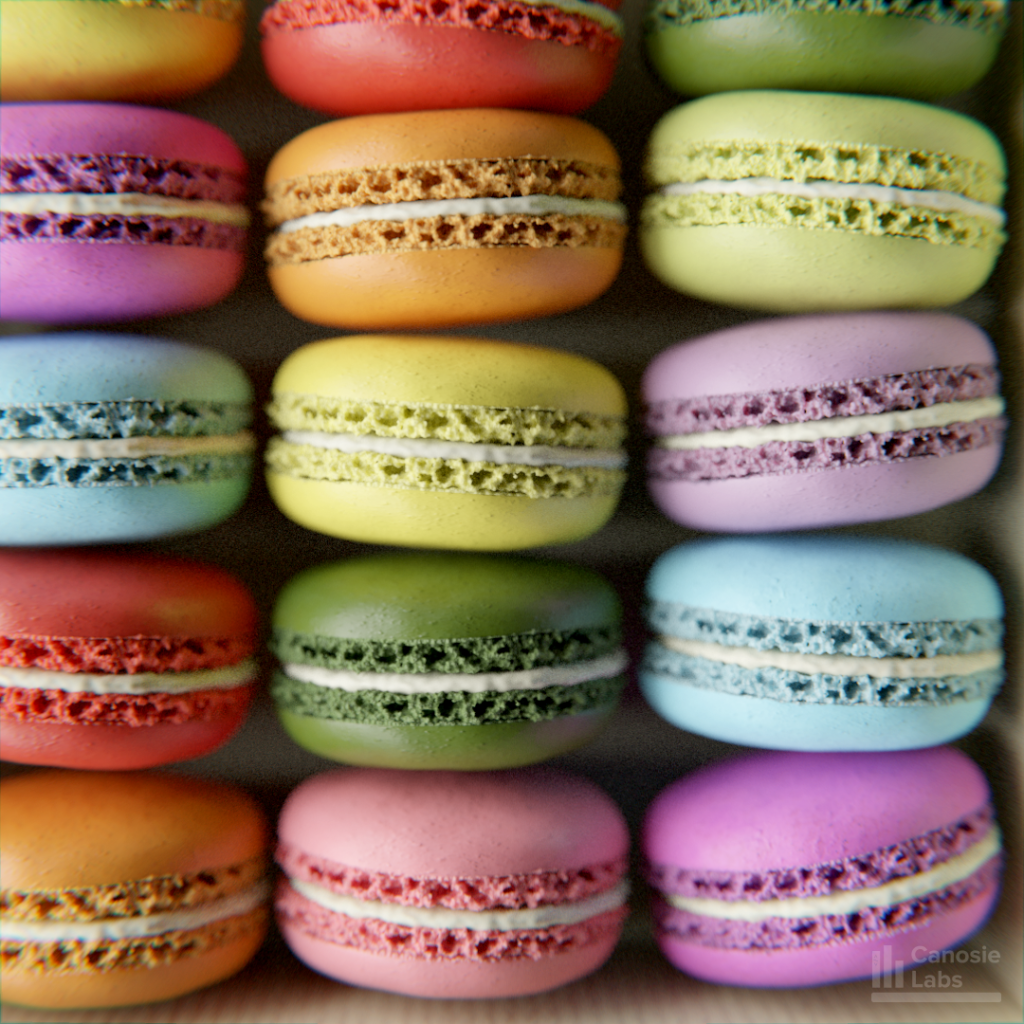
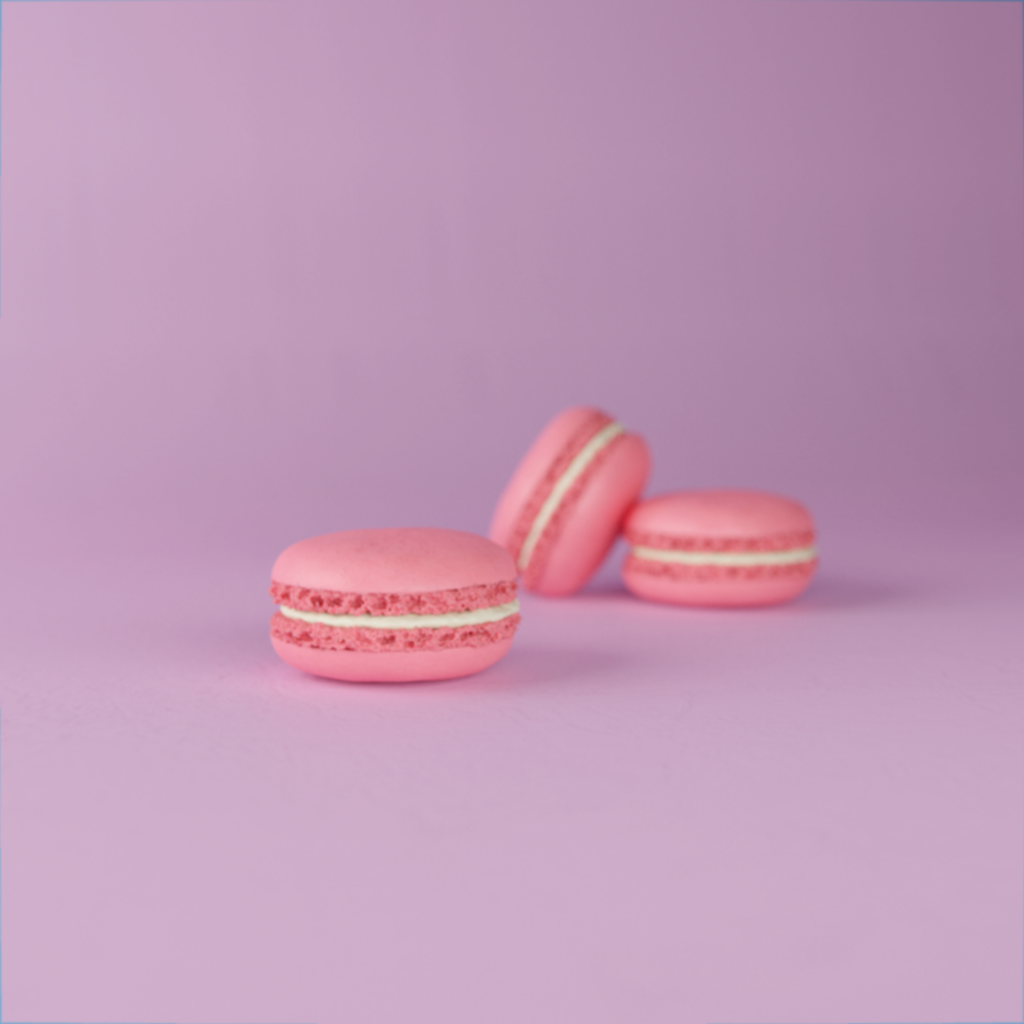
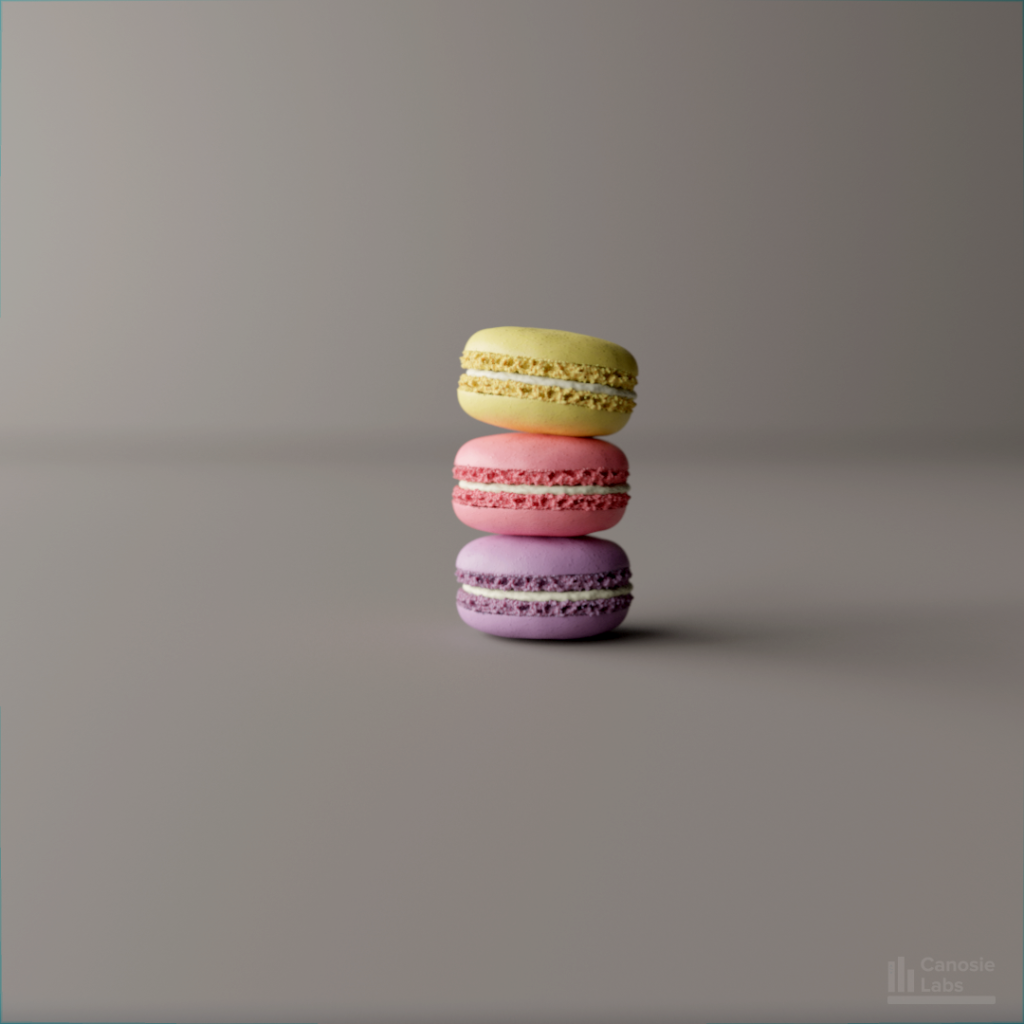
And there we have it. Non-photoscanned macaroons. After some practice you should be abel to generate some macarons like the following:
While there are some manual steps in creating the holes and crevices, we’ve made use of procedural methods as much as possible. I like this method for macarons because you can very each of the texture strengths to create the different kinds of macaroons you see in real life. While I agree creating the holes takes time and practice, the results are pretty good. I think there is some more room for improvement so feel free to post comments, questions or suggestions.
Until next time.
Resources
I’ve provided the materials used in this tutorial for free at the following links.
Check out some of my renders
https://www.instagram.com/canosielabs/?hl=en
hello,thank you for lesson,but i cannot find materials(((
hi,
The materials are linked at the bottom of the blog article in the “Resources” section.